> ## Documentation Index
> Fetch the complete documentation index at: https://dripart-chore-sync-comfy-api-v2-spec.mintlify.site/llms.txt
> Use this file to discover all available pages before exploring further.

# 데모 앱

> Comfy API로 구축된 작동하는 데모 앱에서 시작하세요.

작동하는 데모 앱에서 시작한 다음, 자신의 프로젝트에 맞게 워크플로와 인터페이스를 조정하세요. 가장 빠른 방법을 원한다면 Comfy Cloud를 선택하고, 자체 모델이나 노드가 필요하다면 직접 배포를 선택하세요.

<div className="sample-card-grid">
  <div className="sample-card" data-sample-card="true">
    <div className="sample-card-inner">
      <div className="sample-card-face sample-card-front" data-sample-front="true">
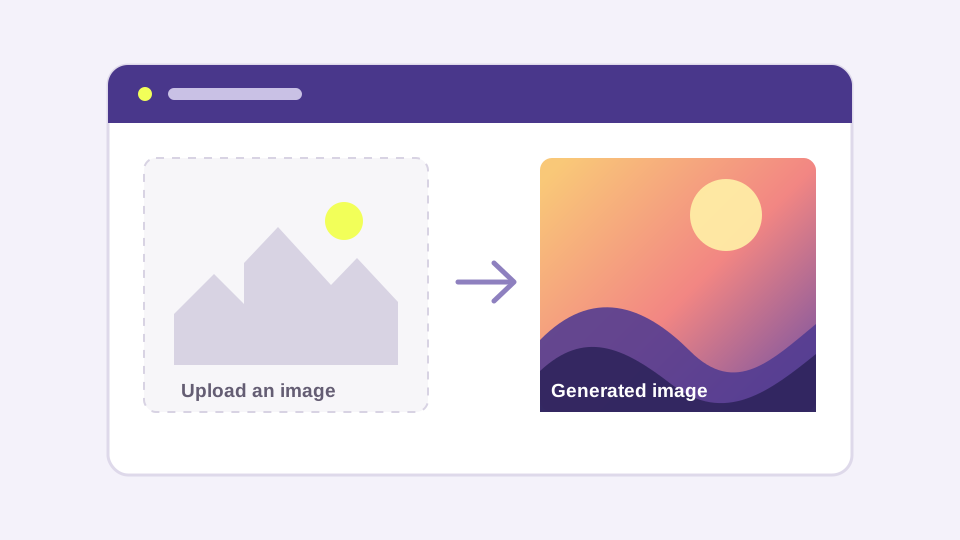
        <img src="https://mintcdn.com/dripart-chore-sync-comfy-api-v2-spec/hElEkp5bFb1VgX_X/images/samples/img2img-web-app.svg?fit=max&auto=format&n=hElEkp5bFb1VgX_X&q=85&s=1ee5b91b82896cdc6c98898be572bd34" alt="이미지 기반 이미지 생성 웹 앱 미리보기" className="sample-card-preview" data-sample-preview="api" noZoom="true" width="960" height="540" data-path="images/samples/img2img-web-app.svg" />

        <div className="sample-card-body">
          <h2>이미지 기반 이미지 생성 웹 앱</h2>
          <p>이미지를 업로드하고 Comfy 워크플로를 실행한 다음, 결과를 Next.js 앱에 표시합니다.</p>

          <div className="sample-card-actions">
            <button type="button" data-sample-open="api">Comfy Cloud 사용</button>
            <button type="button" data-sample-open="endpoint">직접 배포</button>
          </div>

          <div className="sample-card-links">
            <a href="https://github.com/Comfy-Org/comfy-examples/blob/main/img2img-web-app/workflows/workflow_api.json?raw=1">워크플로 다운로드 ↗</a><span>·</span><a href="https://github.com/Comfy-Org/comfy-examples/tree/main/img2img-web-app">소스 보기 ↗</a>
          </div>
        </div>
      </div>

      <div className="sample-card-face sample-card-back" data-sample-path="api" aria-hidden="true" inert="true">
        <div className="sample-path-body">
          <button type="button" data-sample-back="true">← 데모 앱으로 돌아가기</button>
          <p className="sample-path-eyebrow">Comfy Cloud</p><h2>Comfy Cloud로 이미지 기반 이미지 생성 웹 앱 사용</h2>
          <p>Comfy Cloud를 관리형 엔드포인트로 사용합니다. API 키를 생성한 다음 앱 사본을 배포하세요.</p>

          <div className="sample-path-steps">
            <div className="sample-path-step"><span className="sample-path-number">1</span><div className="sample-path-copy"><strong>API 키 생성</strong><span>Comfy API 키를 생성하고 저장합니다. 유효한 Comfy Cloud 구독도 필요합니다.</span></div><a href="https://platform.comfy.org/profile/api-keys">API 키 생성 ↗</a></div>
            <div className="sample-path-step"><span className="sample-path-number">2</span><div className="sample-path-copy"><strong>Vercel에 앱 배포</strong><span>공급자가 사용자의 계정에 이 샘플의 사본을 생성합니다.</span></div><a href="https://vercel.com/new/clone?repository-url=https%3A%2F%2Fgithub.com%2FComfy-Org%2Fcomfy-examples%2Ftree%2Fmain%2Fimg2img-web-app&env=COMFY_BASE_URL%2CCOMFY_API_KEY&envDefaults=%7B%22COMFY_BASE_URL%22%3A%22https%3A%2F%2Fcloud.comfy.org%22%7D">앱 배포 ↗</a></div>
          </div>
        </div>
      </div>

      <div className="sample-card-face sample-card-back" data-sample-path="endpoint" aria-hidden="true" inert="true">
        <div className="sample-path-body">
          <button type="button" data-sample-back="true">← 데모 앱으로 돌아가기</button>
          <p className="sample-path-eyebrow">직접 배포</p><h2>이미지 기반 이미지 생성 웹 앱용 자체 엔드포인트 배포</h2>
          <p>자체 모델이나 커스텀 노드가 필요할 때 Comfy API 서버리스 엔드포인트를 생성합니다.</p>

          <div className="sample-path-steps">
            <div className="sample-path-step"><span className="sample-path-number">1</span><div className="sample-path-copy"><strong>워크플로 다운로드</strong><span>전용 배포 흐름에서 이 API 형식 워크플로를 사용합니다.</span></div><a href="https://github.com/Comfy-Org/comfy-examples/blob/main/img2img-web-app/workflows/workflow_api.json?raw=1">워크플로 다운로드 ↗</a></div>
            <div className="sample-path-step"><span className="sample-path-number">2</span><div className="sample-path-copy"><strong>API 키 생성</strong><span>배포된 앱에서 사용할 키를 생성하고 저장합니다.</span></div><a href="https://platform.comfy.org/profile/api-keys">API 키 생성 ↗</a></div>
            <div className="sample-path-step"><span className="sample-path-number">3</span><div className="sample-path-copy"><strong>워크플로 붙여넣기 및 배포</strong><span>Builds에서 워크플로를 붙여넣고 엔드포인트를 구성한 뒤 URL이 준비될 때까지 기다립니다.</span></div><a href="https://platform.comfy.org/profile/builds">빌드 열기 ↗</a></div>
            <div className="sample-path-step"><span className="sample-path-number">4</span><div className="sample-path-copy"><strong>엔드포인트 URL과 API 키 붙여넣기</strong><span>앱 배포 중에 COMFY\_BASE\_URL과 COMFY\_API\_KEY를 설정합니다.</span></div><a href="https://vercel.com/new/clone?repository-url=https%3A%2F%2Fgithub.com%2FComfy-Org%2Fcomfy-examples%2Ftree%2Fmain%2Fimg2img-web-app&env=COMFY_BASE_URL%2CCOMFY_API_KEY">앱 배포 ↗</a></div>
          </div>
        </div>
      </div>
    </div>
  </div>

  <div className="sample-card" data-sample-card="true">
    <div className="sample-card-inner">
      <div className="sample-card-face sample-card-front" data-sample-front="true">
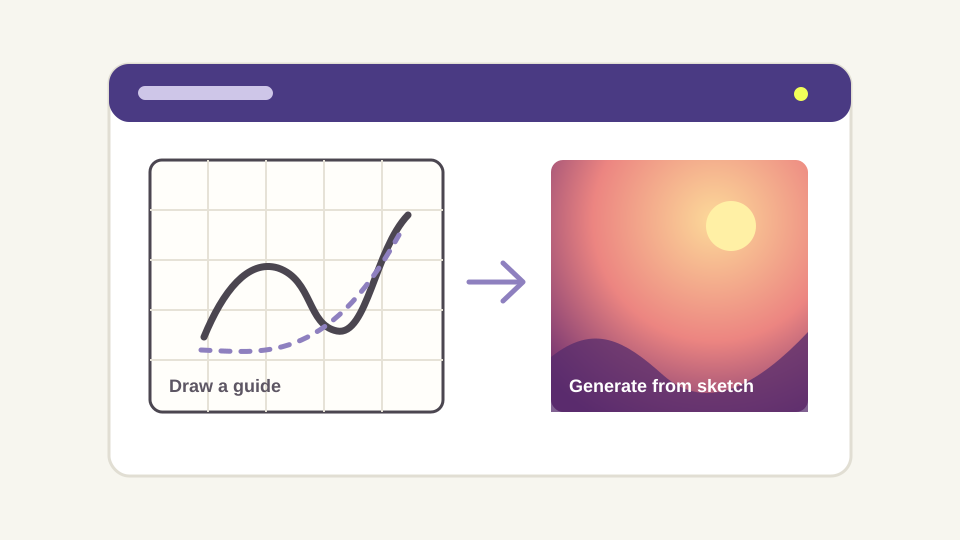
        <img src="https://mintcdn.com/dripart-chore-sync-comfy-api-v2-spec/hElEkp5bFb1VgX_X/images/samples/sketch-to-image.svg?fit=max&auto=format&n=hElEkp5bFb1VgX_X&q=85&s=09d2a9a5f6807bce5f840bc89a85ddca" alt="스케치로 이미지 생성 앱 미리보기" className="sample-card-preview" data-sample-preview="api" noZoom="true" width="960" height="540" data-path="images/samples/sketch-to-image.svg" />

        <div className="sample-card-body">
          <h2>스케치로 이미지 생성</h2><p>가이드를 그리거나 가져온 다음, 가이드와 프롬프트로 이미지를 생성합니다.</p>
          <div className="sample-card-actions"><button type="button" data-sample-open="api">Comfy Cloud 사용</button><button type="button" data-sample-open="endpoint">직접 배포</button></div>
          <div className="sample-card-links"><a href="https://github.com/Comfy-Org/comfy-examples/blob/main/sketch-to-image/workflows/workflow_api.json?raw=1">워크플로 다운로드 ↗</a><span>·</span><a href="https://github.com/Comfy-Org/comfy-examples/tree/main/sketch-to-image">소스 보기 ↗</a></div>
        </div>
      </div>

      <div className="sample-card-face sample-card-back" data-sample-path="api" aria-hidden="true" inert="true">
        <div className="sample-path-body">
          <button type="button" data-sample-back="true">← 데모 앱으로 돌아가기</button>
          <p className="sample-path-eyebrow">Comfy Cloud</p>
          <h2>Comfy Cloud로 스케치로 이미지 생성 사용</h2>
          <p>Comfy Cloud를 관리형 엔드포인트로 사용합니다. API 키를 생성한 다음 앱 사본을 배포하세요.</p>

          <div className="sample-path-steps">
            <div className="sample-path-step"><span className="sample-path-number">1</span><div className="sample-path-copy"><strong>API 키 생성</strong><span>Comfy API 키를 생성하고 저장합니다. 유효한 Comfy Cloud 구독도 필요합니다.</span></div><a href="https://platform.comfy.org/profile/api-keys">API 키 생성 ↗</a></div>
            <div className="sample-path-step"><span className="sample-path-number">2</span><div className="sample-path-copy"><strong>Vercel에 앱 배포</strong><span>공급자가 사용자의 계정에 이 샘플의 사본을 생성합니다.</span></div><a href="https://vercel.com/new/clone?repository-url=https%3A%2F%2Fgithub.com%2FComfy-Org%2Fcomfy-examples%2Ftree%2Fmain%2Fsketch-to-image&env=COMFY_BASE_URL%2CCOMFY_API_KEY&envDefaults=%7B%22COMFY_BASE_URL%22%3A%22https%3A%2F%2Fcloud.comfy.org%22%7D">앱 배포 ↗</a></div>
          </div>
        </div>
      </div>

      <div className="sample-card-face sample-card-back" data-sample-path="endpoint" aria-hidden="true" inert="true">
        <div className="sample-path-body">
          <button type="button" data-sample-back="true">← 데모 앱으로 돌아가기</button>
          <p className="sample-path-eyebrow">직접 배포</p>
          <h2>스케치로 이미지 생성용 자체 엔드포인트 배포</h2>
          <p>자체 모델이나 커스텀 노드가 필요할 때 Comfy API 서버리스 엔드포인트를 생성합니다.</p>

          <div className="sample-path-steps">
            <div className="sample-path-step"><span className="sample-path-number">1</span><div className="sample-path-copy"><strong>워크플로 다운로드</strong><span>전용 배포 흐름에서 이 API 형식 워크플로를 사용합니다.</span></div><a href="https://github.com/Comfy-Org/comfy-examples/blob/main/sketch-to-image/workflows/workflow_api.json?raw=1">워크플로 다운로드 ↗</a></div>
            <div className="sample-path-step"><span className="sample-path-number">2</span><div className="sample-path-copy"><strong>API 키 생성</strong><span>배포된 앱에서 사용할 키를 생성하고 저장합니다.</span></div><a href="https://platform.comfy.org/profile/api-keys">API 키 생성 ↗</a></div>
            <div className="sample-path-step"><span className="sample-path-number">3</span><div className="sample-path-copy"><strong>워크플로 붙여넣기 및 배포</strong><span>Builds에서 워크플로를 붙여넣고 엔드포인트를 구성한 뒤 URL이 준비될 때까지 기다립니다.</span></div><a href="https://platform.comfy.org/profile/builds">빌드 열기 ↗</a></div>
            <div className="sample-path-step"><span className="sample-path-number">4</span><div className="sample-path-copy"><strong>엔드포인트 URL과 API 키 붙여넣기</strong><span>앱 배포 중에 COMFY\_BASE\_URL과 COMFY\_API\_KEY를 설정합니다.</span></div><a href="https://vercel.com/new/clone?repository-url=https%3A%2F%2Fgithub.com%2FComfy-Org%2Fcomfy-examples%2Ftree%2Fmain%2Fsketch-to-image&env=COMFY_BASE_URL%2CCOMFY_API_KEY">앱 배포 ↗</a></div>
          </div>
        </div>
      </div>
    </div>
  </div>

  <div className="sample-card" data-sample-card="true">
    <div className="sample-card-inner">
      <div className="sample-card-face sample-card-front" data-sample-front="true">
        <img src="https://mintcdn.com/dripart-chore-sync-comfy-api-v2-spec/hElEkp5bFb1VgX_X/images/samples/discord-image-bot.svg?fit=max&auto=format&n=hElEkp5bFb1VgX_X&q=85&s=f5950f67dc97e484911955c658492dc9" alt="Discord 이미지 봇 미리보기" className="sample-card-preview" data-sample-preview="api" noZoom="true" width="960" height="540" data-path="images/samples/discord-image-bot.svg" />

        <div className="sample-card-body">
          <h2>Discord 이미지 봇</h2><p>Discord 서버에 `/imagine` 명령을 추가하고 함께 제공되는 Comfy 워크플로를 실행합니다.</p>
          <div className="sample-card-actions"><button type="button" data-sample-open="api">Comfy Cloud 사용</button><button type="button" data-sample-open="endpoint">직접 배포</button></div>
          <div className="sample-card-links"><a href="https://github.com/Comfy-Org/comfy-discord-image-bot/blob/main/workflows/workflow_api.json?raw=1">워크플로 다운로드 ↗</a><span>·</span><a href="https://github.com/Comfy-Org/comfy-discord-image-bot">소스 보기 ↗</a></div>
        </div>
      </div>

      <div className="sample-card-face sample-card-back" data-sample-path="api" aria-hidden="true" inert="true">
        <div className="sample-path-body">
          <button type="button" data-sample-back="true">← 데모 앱으로 돌아가기</button>
          <p className="sample-path-eyebrow">Comfy Cloud</p>
          <h2>Comfy Cloud로 Discord 이미지 봇 사용</h2>
          <p>Comfy Cloud를 관리형 엔드포인트로 사용합니다. API 키를 생성한 다음 앱 사본을 배포하세요.</p>

          <div className="sample-path-steps">
            <div className="sample-path-step"><span className="sample-path-number">1</span><div className="sample-path-copy"><strong>API 키 생성</strong><span>Comfy API 키를 생성하고 저장합니다. 유효한 Comfy Cloud 구독도 필요합니다.</span></div><a href="https://platform.comfy.org/profile/api-keys">API 키 생성 ↗</a></div>
            <div className="sample-path-step"><span className="sample-path-number">2</span><div className="sample-path-copy"><strong>Render에 앱 배포</strong><span>공급자가 사용자의 계정에 이 샘플의 사본을 생성합니다.</span></div><a href="https://render.com/deploy?repo=https%3A%2F%2Fgithub.com%2FComfy-Org%2Fcomfy-discord-image-bot">앱 배포 ↗</a></div>
          </div>
        </div>
      </div>

      <div className="sample-card-face sample-card-back" data-sample-path="endpoint" aria-hidden="true" inert="true">
        <div className="sample-path-body">
          <button type="button" data-sample-back="true">← 데모 앱으로 돌아가기</button>
          <p className="sample-path-eyebrow">직접 배포</p>
          <h2>Discord 이미지 봇용 자체 엔드포인트 배포</h2>
          <p>자체 모델이나 커스텀 노드가 필요할 때 Comfy API 서버리스 엔드포인트를 생성합니다.</p>

          <div className="sample-path-steps">
            <div className="sample-path-step"><span className="sample-path-number">1</span><div className="sample-path-copy"><strong>워크플로 다운로드</strong><span>전용 배포 흐름에서 이 API 형식 워크플로를 사용합니다.</span></div><a href="https://github.com/Comfy-Org/comfy-discord-image-bot/blob/main/workflows/workflow_api.json?raw=1">워크플로 다운로드 ↗</a></div>
            <div className="sample-path-step"><span className="sample-path-number">2</span><div className="sample-path-copy"><strong>API 키 생성</strong><span>배포된 앱에서 사용할 키를 생성하고 저장합니다.</span></div><a href="https://platform.comfy.org/profile/api-keys">API 키 생성 ↗</a></div>
            <div className="sample-path-step"><span className="sample-path-number">3</span><div className="sample-path-copy"><strong>워크플로 붙여넣기 및 배포</strong><span>Builds에서 워크플로를 붙여넣고 엔드포인트를 구성한 뒤 URL이 준비될 때까지 기다립니다.</span></div><a href="https://platform.comfy.org/profile/builds">빌드 열기 ↗</a></div>
            <div className="sample-path-step"><span className="sample-path-number">4</span><div className="sample-path-copy"><strong>엔드포인트 URL과 API 키 붙여넣기</strong><span>앱 배포 중에 COMFY\_BASE\_URL과 COMFY\_API\_KEY를 설정합니다.</span></div><a href="https://render.com/deploy?repo=https%3A%2F%2Fgithub.com%2FComfy-Org%2Fcomfy-discord-image-bot">앱 배포 ↗</a></div>
          </div>
        </div>
      </div>
    </div>
  </div>
</div>

<Note>
  두 경로 모두 [Comfy API 키](https://platform.comfy.org/profile/api-keys)가 필요합니다. 직접 배포의 경우 워크플로를 다운로드하고, Builds에서 이를 붙여넣어 서버리스 엔드포인트를 구성한 뒤 URL이 준비될 때까지 기다렸다가, 해당 URL과 API 키를 Vercel 또는 Render 배포에 붙여넣습니다.
</Note>

데모 앱을 추가하고 싶으신가요? [예제 저장소](https://github.com/Comfy-Org/comfy-examples)를 참고하세요.