

Instance Types
Comfy Desktop supports four types of instances. Each type displays a distinct icon on its card and in the title bar.
The image below labels the key actions available for each instance card:
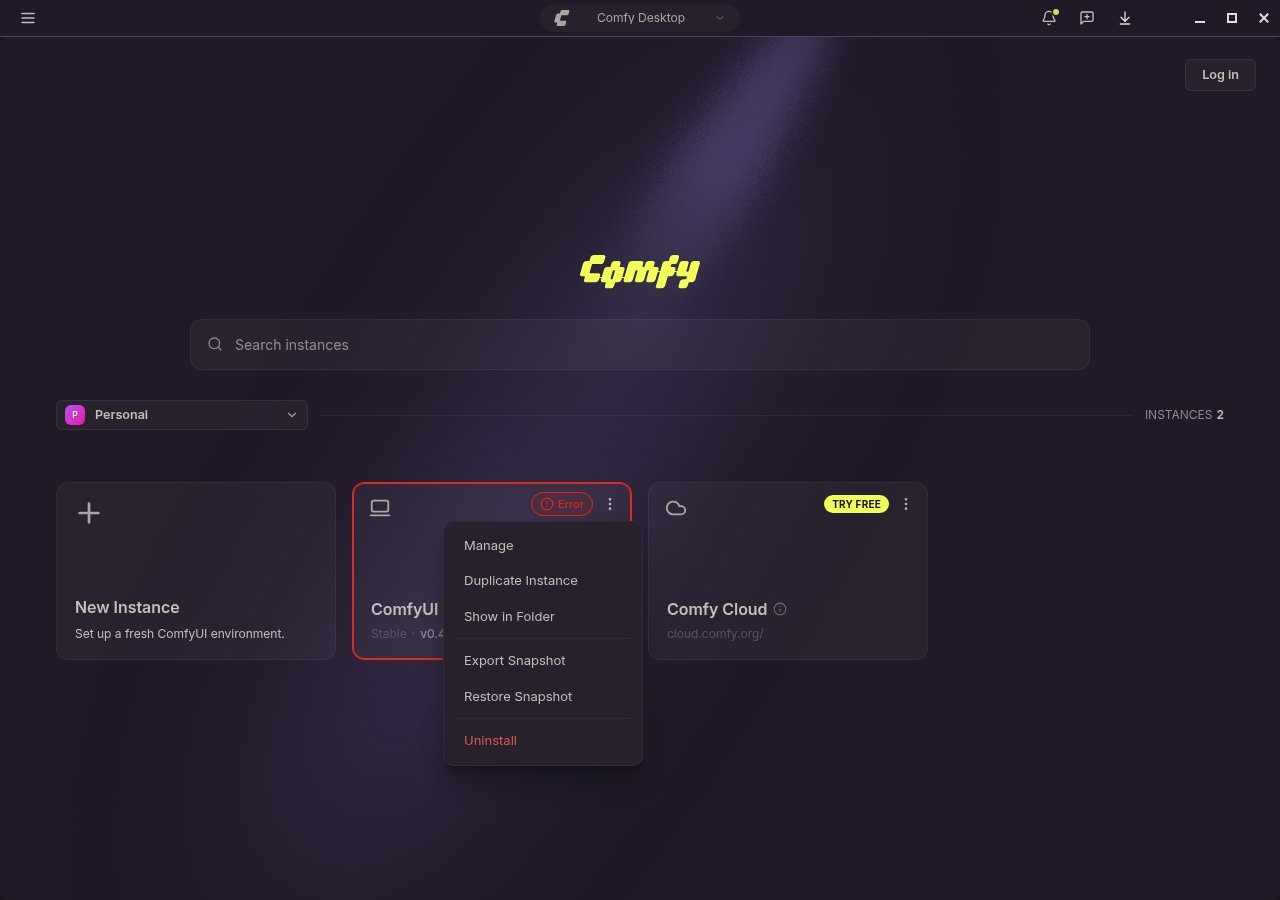
- New Instance: Create a brand new ComfyUI instance. See Creating a New Instance. You can also create an instance from a snapshot file.
- ⋮ Menu: Click the three-dot icon to open the action menu for an instance.
- Manage: Open the Manage panel to configure the instance (path, launch args, model directories, environment variables). See the Manage page.
- Restore Snapshot: Revert the instance to a previous snapshot. See the Snapshots page.
- Share: Export a snapshot of the instance to share with others.
- Copy Installation: Duplicate an existing standalone installation with its own Python environment and custom nodes. See Copying an Installation.
- Forget: Remove the instance from the Chooser without deleting its files (equivalent to Untrack).
- Uninstall: Permanently delete the instance and all its files from disk. See Uninstalling an Instance for details on Forget and Uninstall.
Creating a New Instance
Click the + card (top-left) in the Chooser view to add a new ComfyUI instance.1
Create a New Instance
- Windows
- macOS
- Linux
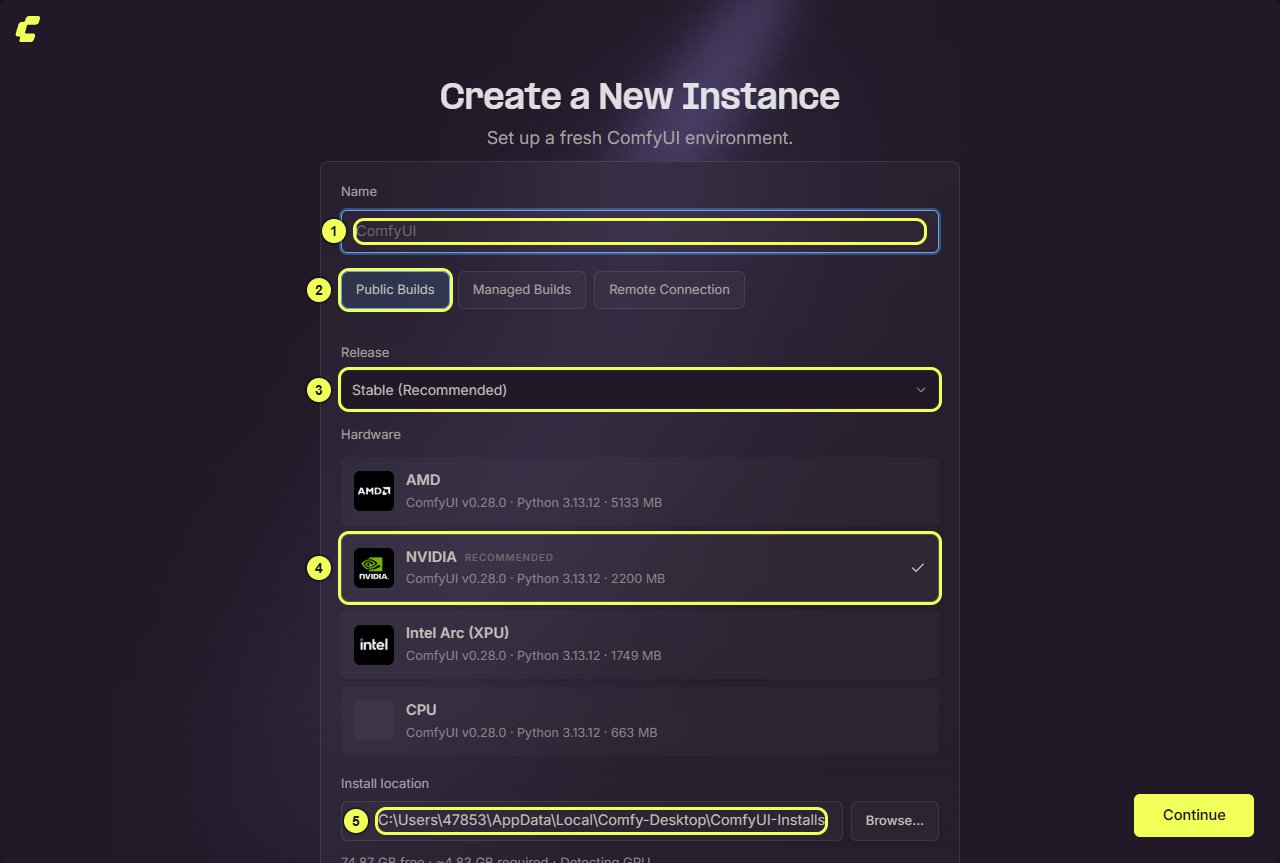
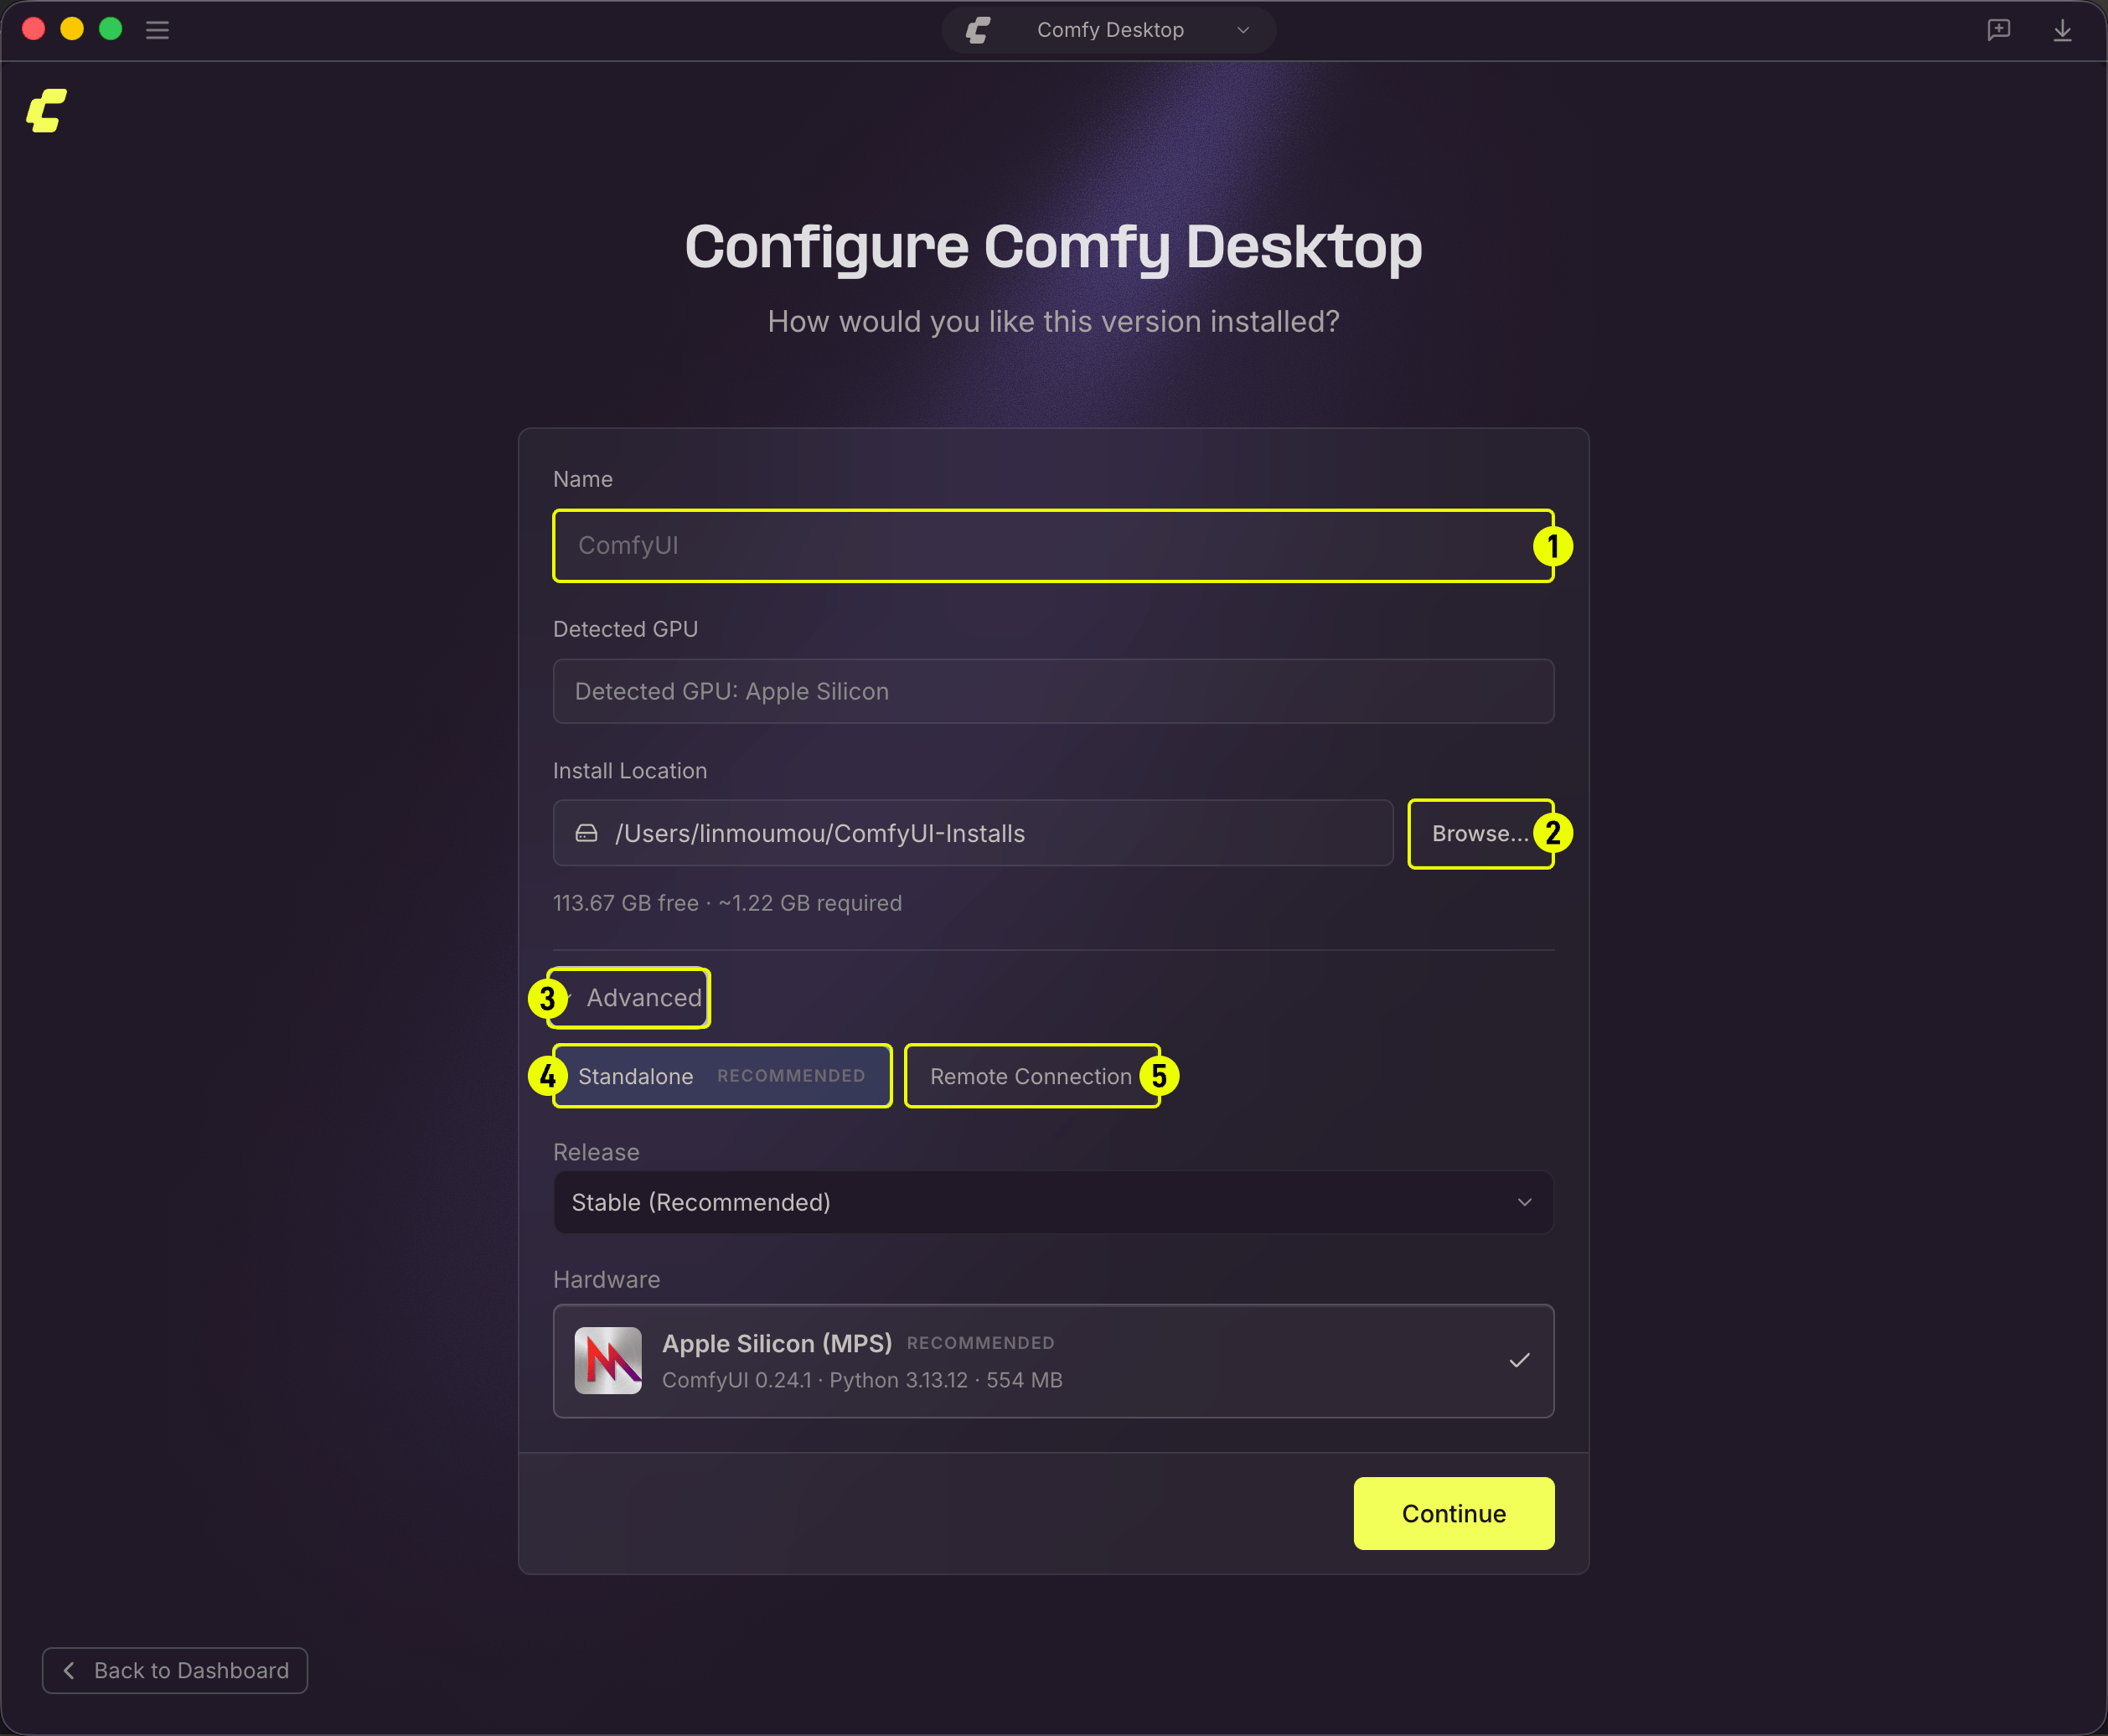
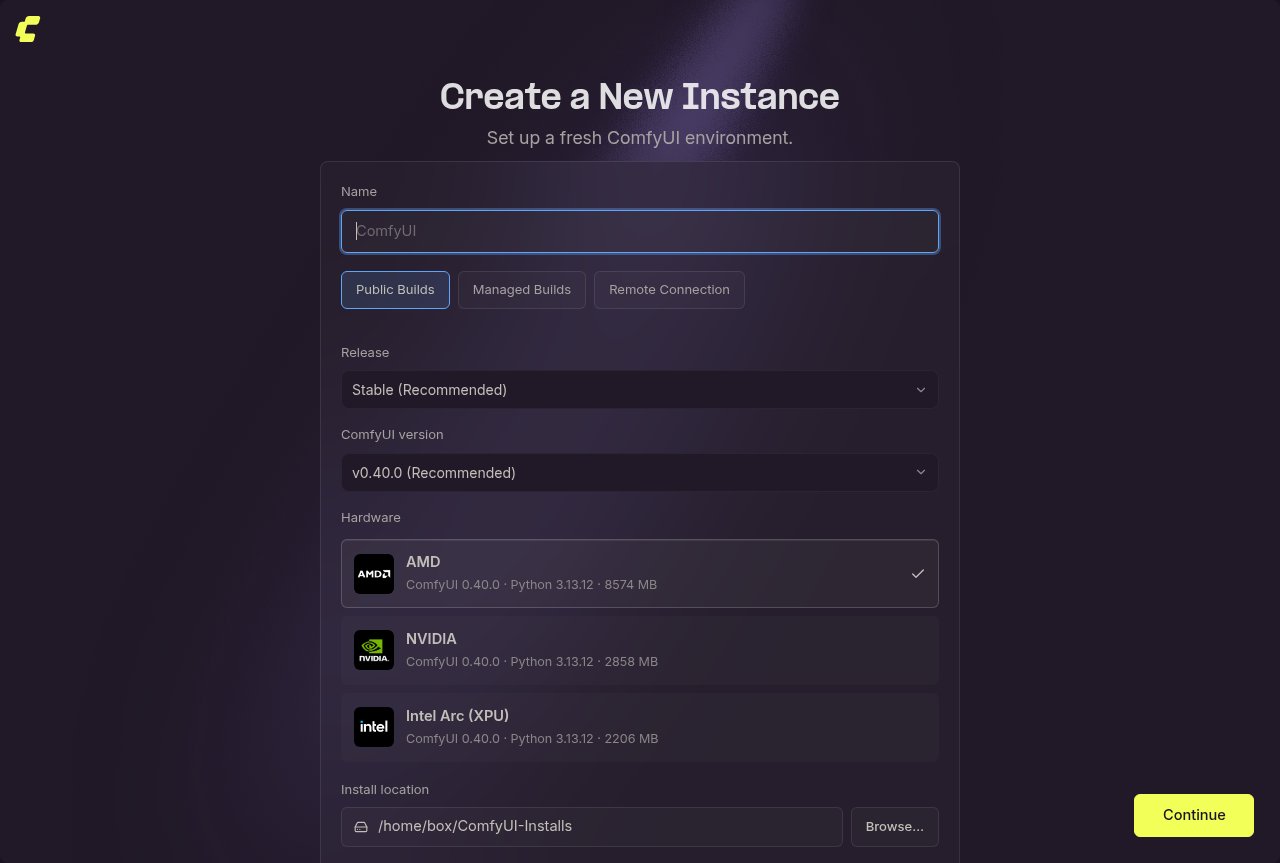
- Name: The name of your instance. The default is “ComfyUI”.
- Public Builds: The recommended option. A standard ComfyUI install built for your detected hardware. Select Managed Builds to install a Build from one of your workspaces instead (see Workspaces and Builds), or Remote Connection to connect to a ComfyUI instance running on another machine.
- Release: The release channel to install. Stable (Recommended) is preselected.
- Hardware: Comfy Desktop detects your GPU and preselects the matching build (NVIDIA, AMD, Intel Arc (XPU), or CPU). Each option shows the ComfyUI version, the Python version, and the download size.
- Install Location: Where ComfyUI is installed. On Windows, it’s strongly recommended to use an SSD and avoid the root of the C: drive. The field shows free space on the drive and an install size estimate when Comfy Desktop knows it.
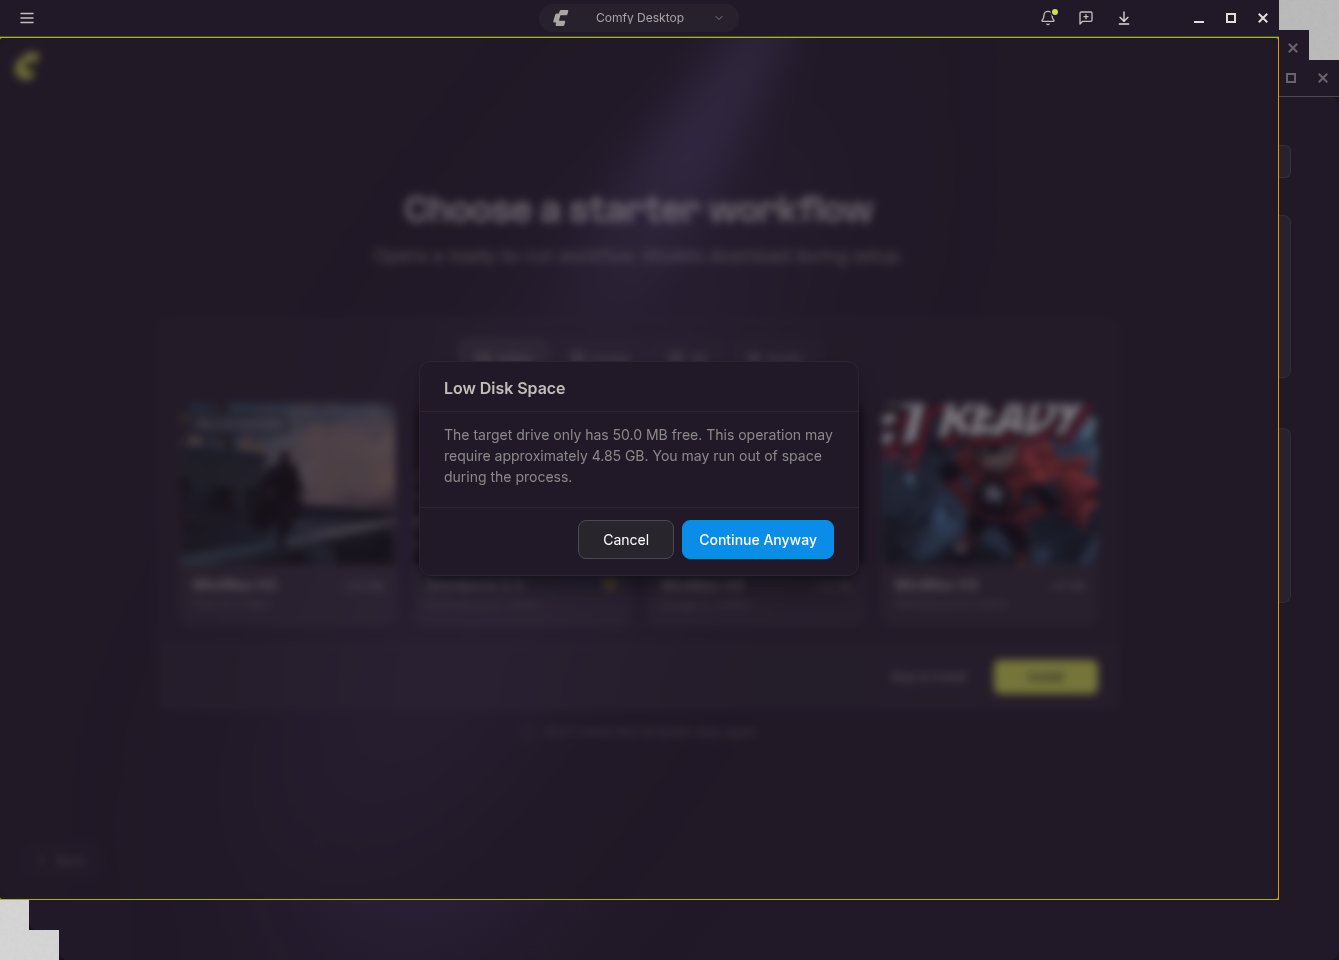
2
Installing
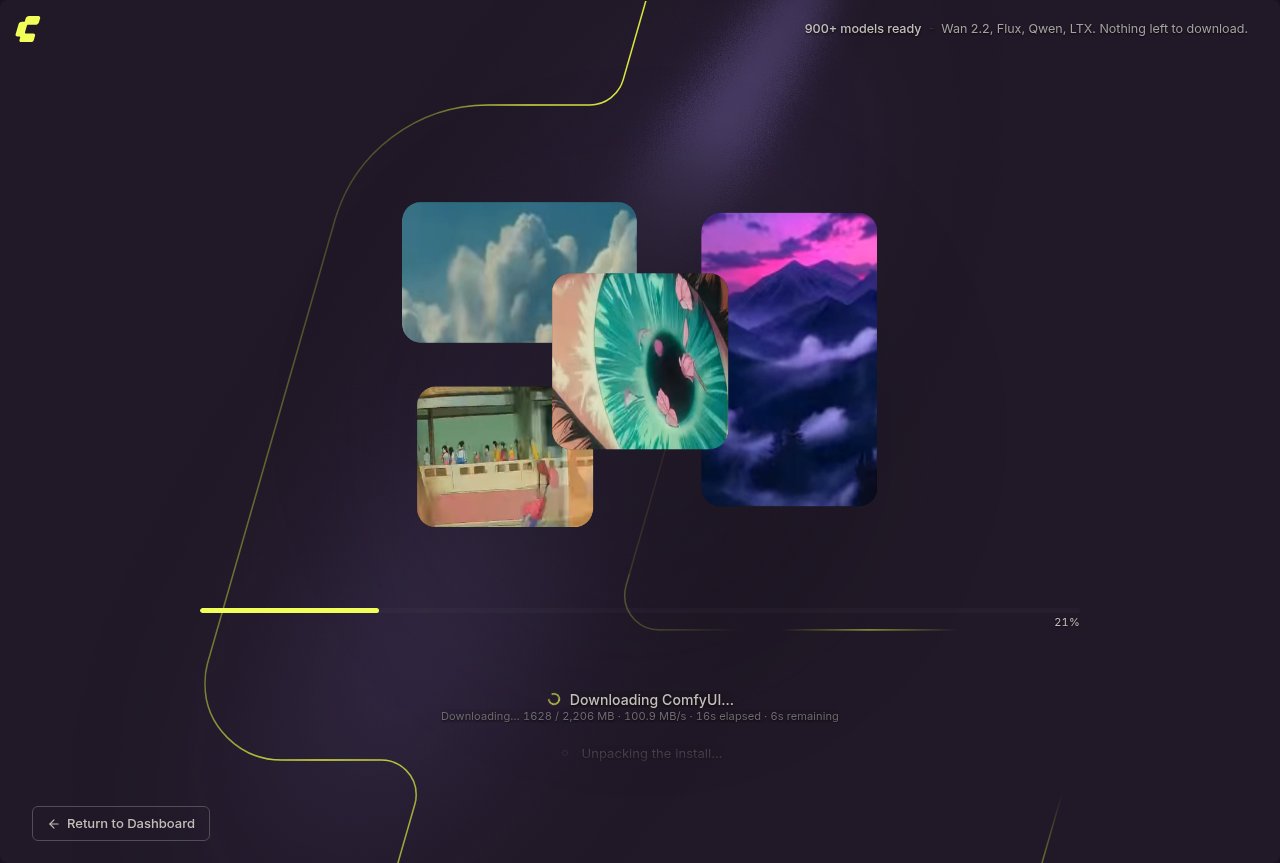
3
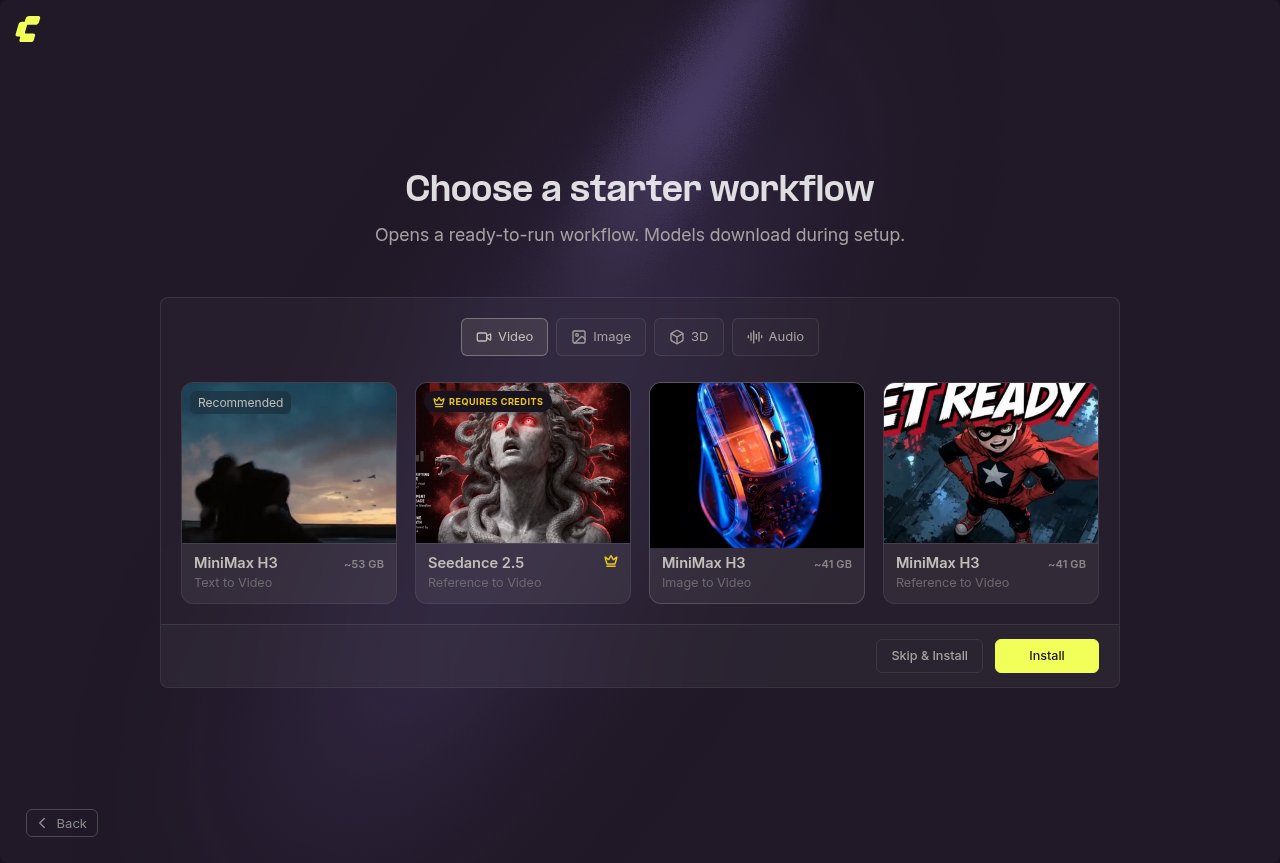
Choose a Template
Tracking an Existing Installation
If you already have a ComfyUI installation (either manually set up from the Git repository or downloaded as a portable version), you can add it to Comfy Desktop without creating a new one. Click New Instance on the Dashboard to open the installation menu, then select Add Existing Instance.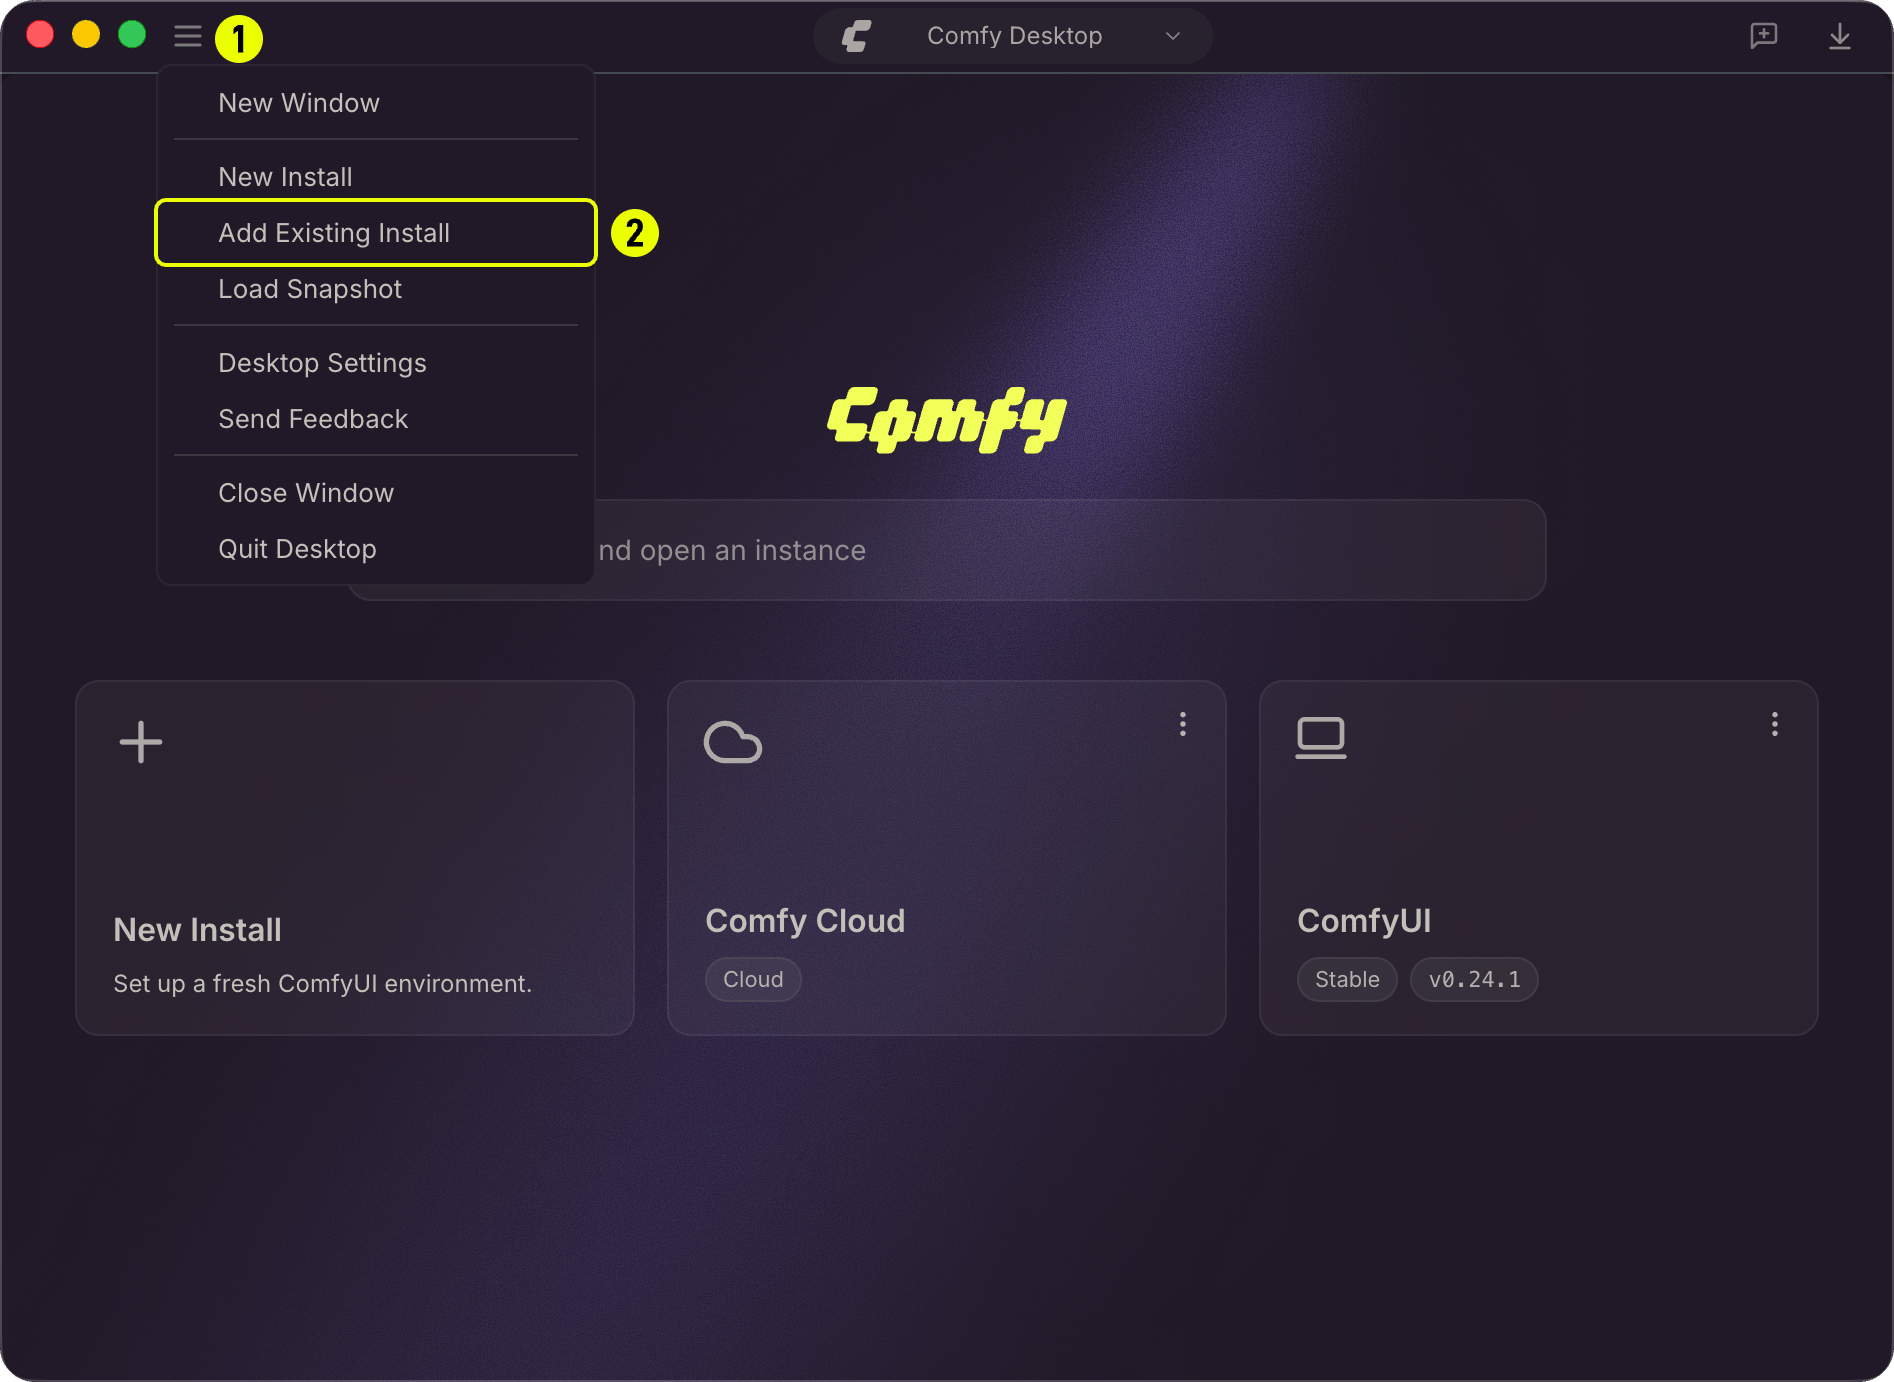
- Click New Instance to open the installation options.
- Select Add Existing Instance to open the tracking dialog.
Detecting Your Installation
In the tracking dialog, click Browse to select a ComfyUI directory. Comfy Desktop probes the folder and automatically detects the installation type. For a Windows portable install, the probe looks for:standalone-envdirectory — the bundled Python environmentComfyUI/main.py— the ComfyUI entry point
models/anduser/directories — signs of a configured ComfyUI.venvdirectory — a Python virtual environment
Setting Paths
After selecting the directory, the dialog shows the detected paths. You can adjust them if needed.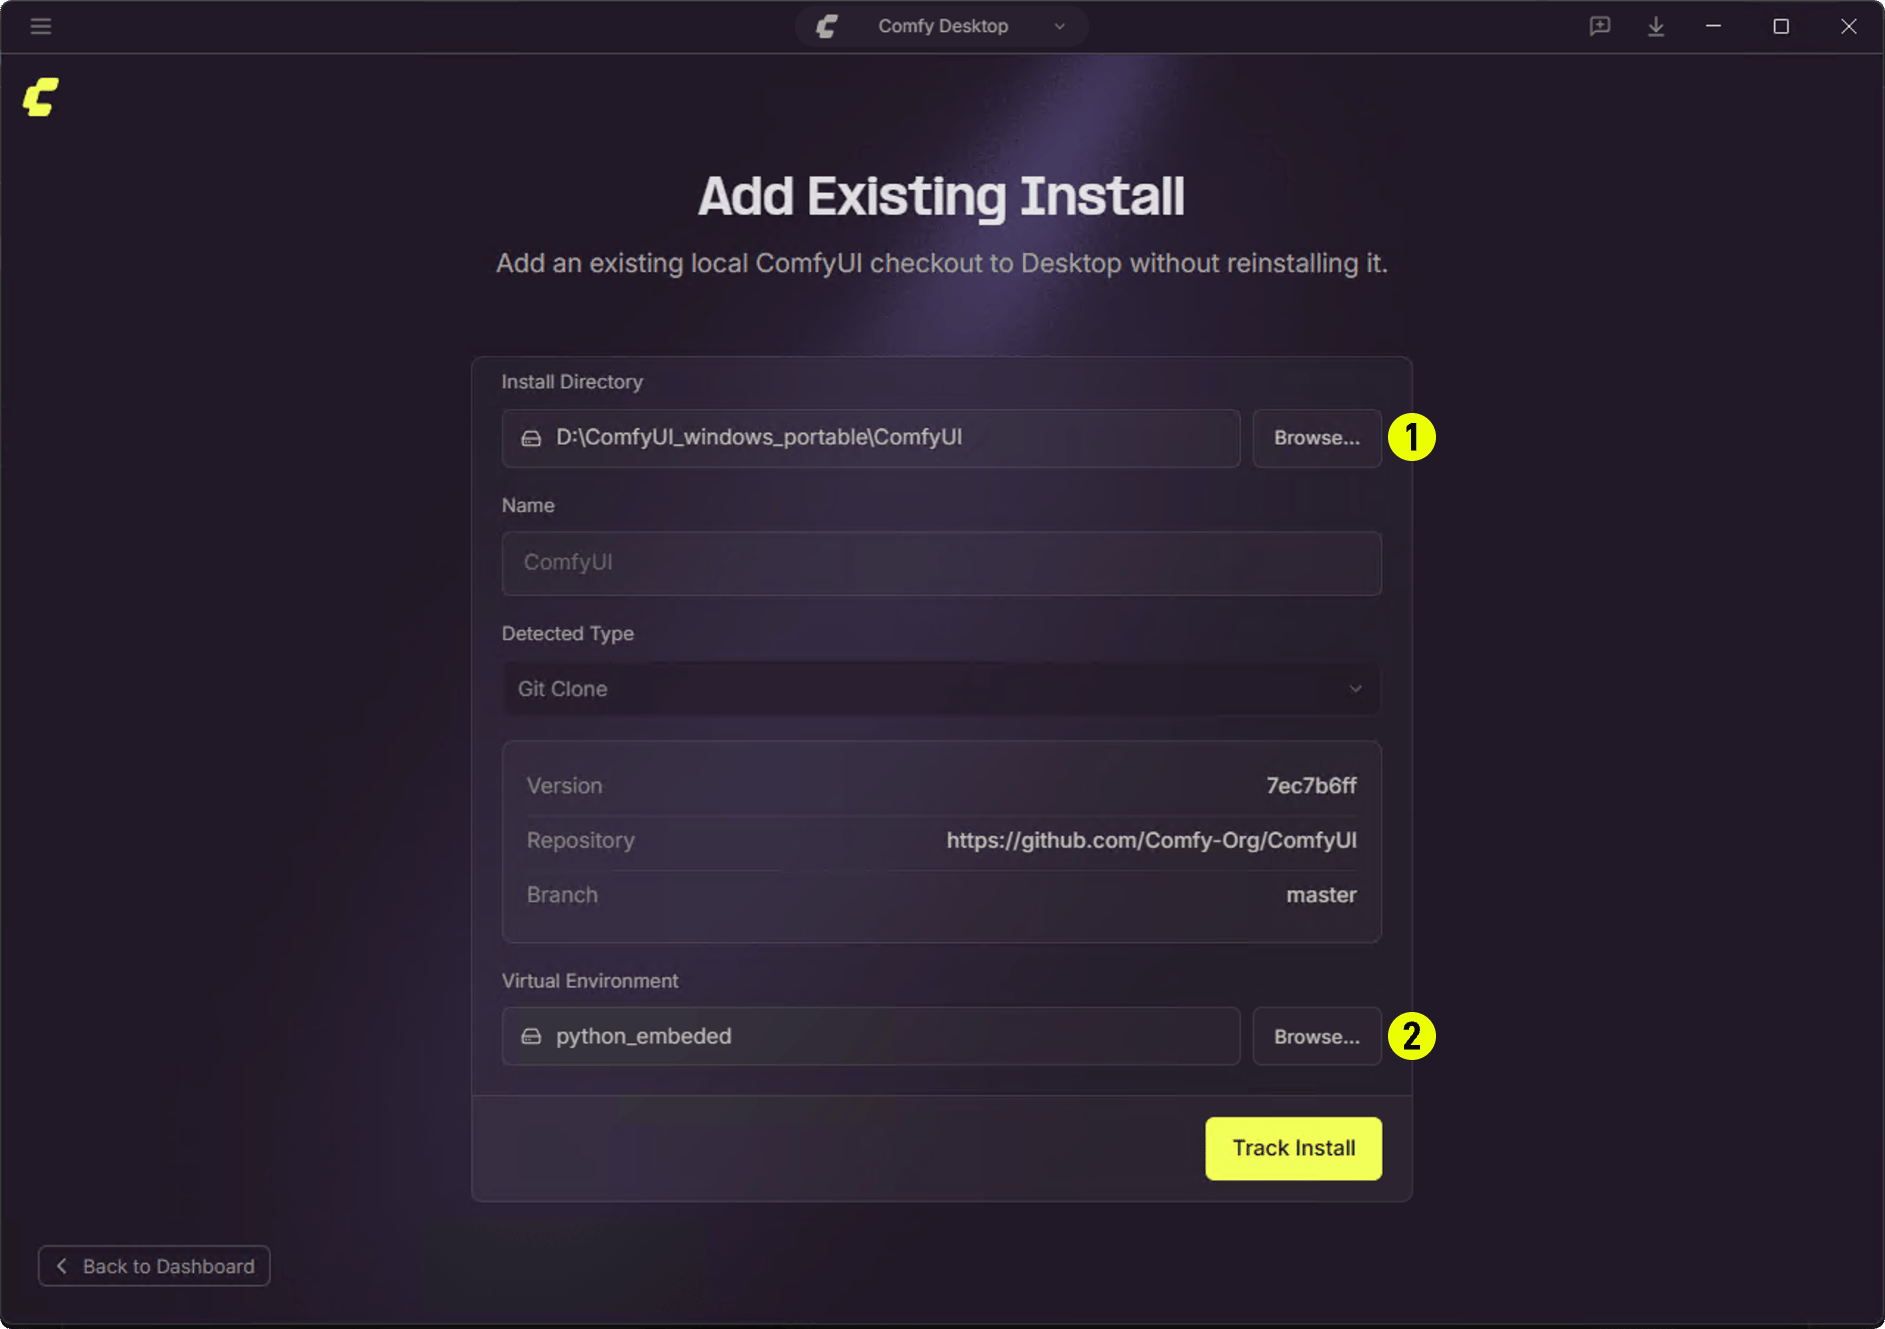
- ComfyUI Directory: The path to the ComfyUI folder containing
main.py. For portable installations, this is typically the folder inside the portable package.- Portable example:
D:\ComfyUI_windows_portable\ComfyUI
- Portable example:
- Python Environment: The path to the Python environment folder. Comfy Desktop detects this automatically and lets you override it if needed.
- Portable example:
D:\ComfyUI_windows_portable\python_embeded - Git repo example:
<ComfyUI_dir>/.venv
- Portable example:
Track vs Standalone
The key difference between a Tracked (Add Existing Instance) installation and a Standalone installation is how updates are managed:
Note: Tracked installations use launchMode: 'external'. Comfy Desktop launches the existing ComfyUI process without managing it internally. Snapshots are currently supported for Standalone instances only.
Launching, Stopping, and Restarting an Instance
↩ Back to overviewLaunching an Instance
Click an instance card in the Chooser to launch it. While ComfyUI starts, the window shows the startup progress, then the ComfyUI interface once the server is ready.Launching While Another Instance Is Running
When you launch a local instance while another local instance is running or starting, Comfy Desktop shows an An instance is already running dialog that lists the instances it would stop:- Close & Launch: stops the listed instances, then launches the one you picked.
- Run All: launches the new instance alongside the running ones.
Stopping an Instance
Select Stop from the instance card’s ⋮ menu. The ComfyUI server stops and the window stays open with a ComfyUI is stopped card. Select Relaunch ComfyUI to start the server again, or Return to Dashboard to go back to the Chooser.Restarting After a Crash
If ComfyUI fails to start or exits unexpectedly, the window stays open with a card describing what happened:- ComfyUI could not start: the instance did not start.
- ComfyUI exited unexpectedly: the process stopped. When Comfy Desktop can read it, the card also shows the exit code, or the signal that ended the process.
- Another ComfyUI is using this installation’s database: close that ComfyUI (or the app that started it), or give one of them its own database location with the
--database-urlstartup argument. - Any other database failure, from one locked by another program to one written by a newer version of ComfyUI or impossible to create in that folder: the message names the file and the fix, and ends with the option to start the instance without the asset system, by adding
--disable-assetsto its startup arguments.
Uninstalling an Instance
↩ Back to overview When you want to remove an instance, the three-dot menu offers two options depending on whether you want to keep the files or delete everything.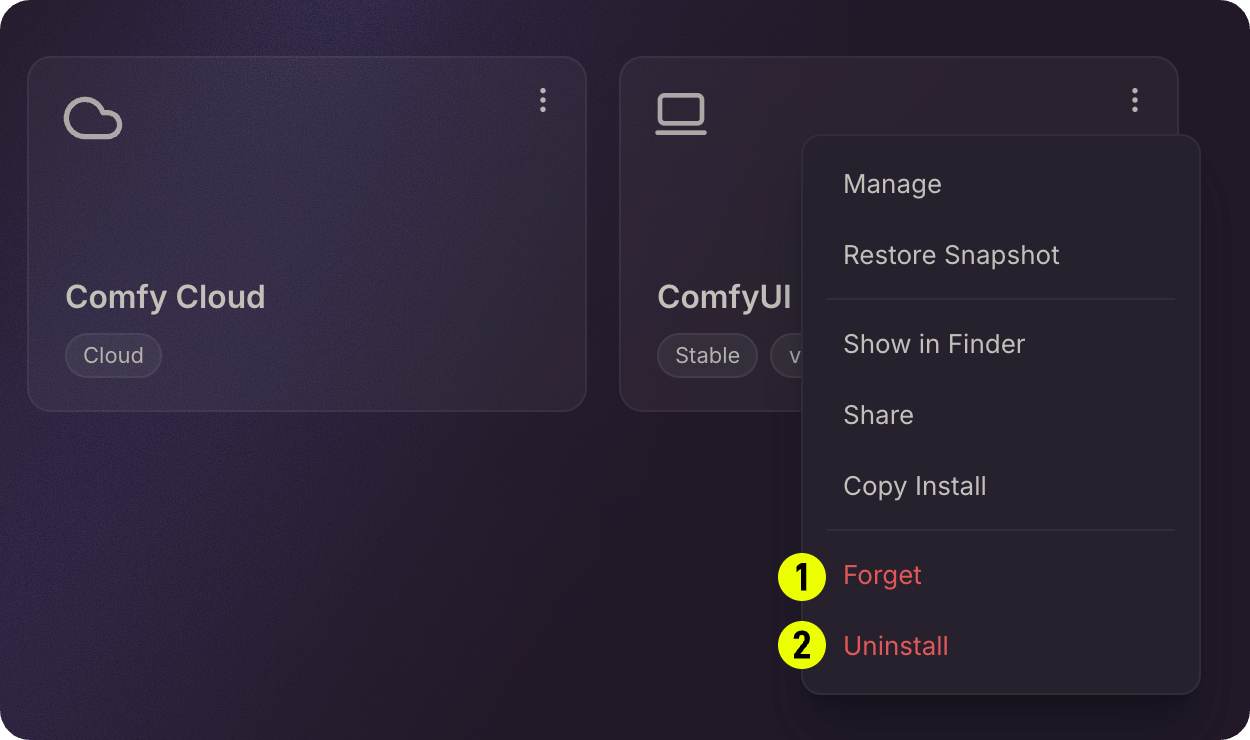
- Forget / Untrack: Removes the instance from the Chooser list without deleting any files. The installation folder and all its data remain on disk. Use this when you just want to clean up the list but might need the instance again later.
- Uninstall / Delete: Permanently removes the installation and all its files from disk. Model files in shared directories are not affected.
Copying an Installation
↩ Back to overview You can duplicate an existing standalone installation by right-clicking its card and selecting Copy Installation. This creates a copy with:- A new Python environment
- The same ComfyUI version
- Its own custom node setup
Editing an Instance
↩ Back to overview In the Manage panel for an instance, you can:- Change the installation path
- Adjust launch arguments
- Modify model directories
- Update environment variables